HOW TOUse SecGen to Generate a Random Vulnerable Machine
Recently, I ran across SecGen, a project which allows a user to create random vulnerable machines. I absolutely love vulnerable machines, since a vulnerable VM is a safe and legal way to practice hacking tactics, test out new tools, and exercise your puzzle-solving skills.
What really got me interested in SecGen was the randomization feature. Most vulnerable machine downloads are static, meaning each version will always have the same vulnerabilities. Not very realistic. SecGen is different because it can generate unique vulnerable machines.
Instead of digging through VulnHub, or going through the Metasploitable checklist, you can have a vulnerable machine ready to go in minutes, with a different set of challenges each time. SecGen also allows for a good bit of user customization, which would make it useful in generating CTFs, or specifying a challenge for yourself.
In this article, I will cover the installation of SecGen on Kali Linux and the generation of a vulnerable machine. If you need a good starter Kali computer for hacking, you can check out our guide linked below on setting one up on the low-cost Raspberry Pi.
Step 1Installing SecGen
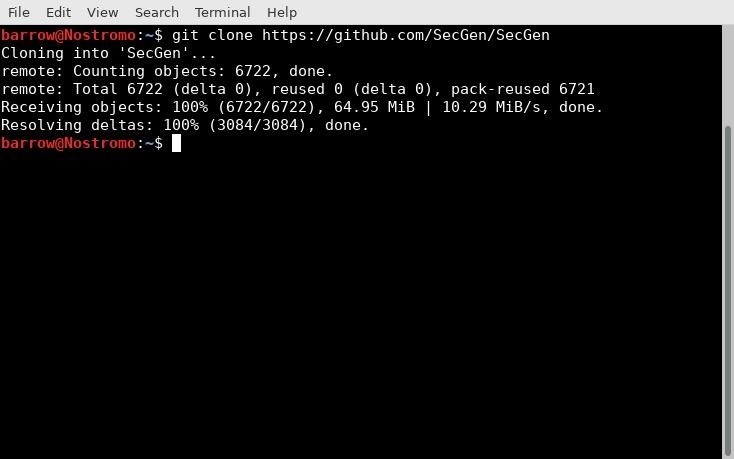
As always, we'll need to update before beginning to ensure everything works properly. You can do this by running apt-get update. After updating, the first thing to do is clone a copy of this project from the git repository. To do so, type the following into terminal.
git clone https://github.com/SecGen/SecGen
Once we have our source where we want it, it's time to make sure we have all the dependencies required. To do so, execute the following command in terminal.
sudo apt install ruby-dev zlib1g-dev liblzma-dev build-essential patch virtualbox ruby-bundler vagrant imagemagick libmagickwand-dev
Once all of the dependencies have completed installation, navigate to your SecGen directory with cd SecGen and run the command:
bundle install
I didn't prepend sudo to this command because it's better practice to run bundle as a non-privileged user. It will prompt for your password, when necessary. Running bundle as root can cause issues and conflicts on your system.
If you get a message like the one above, simply check your Ruby version number by typing the following.
ruby --version
Depending on your Ruby version complete the steps required. In my case, none.
Step 2Setting Up Your First VM
Generating a random vulnerable VM is supposed to be as easy as typing the following into terminal.
ruby secgen.rb run
Unfortunately, at the time of writing, there is an issue with the version of Vagrant from the Kali repository. I also had some issues with Ruby gems. If your machine refuses to come up and has fatal errors, I recommend downgrading your version of Vagrant. In order to do this, you can execute the following command in terminal.
apt purge vagrant
Then, download the Debian package from the Vagrant site.
We'll use dpkg to install the vagrant.deb file by typing the following.
We'll use dpkg to install the vagrant.deb file by typing the following.
dpkg -i vagrant1.9.7x86_64.deb
Now, go back to your SecGen folder and try the following command.
ruby secgen.rb run
If this works without errors, you don't need to clean up your Ruby gems. If you encounter errors, you may have some gem issues to fix. You can fix these issues with the command below.
sudo gem cleanup
I had to do both of the above steps in order to get SecGen running on my system. You may not need to do any. I hope that this issue will be resolved fairly quickly in the future. Once I had completed both steps, I was able to start building my vulnerable machine with the following command.
ruby secgen.rb run
The build process takes some time, but it's not too bad. Considering the time it takes to put together a vulnerable machine as an individual, this wait is painless.
Looks good. We now have a randomized vulnerable machine. Below, we can see some of the details of our machine.
Networking Your Vulnerable Guest OS
As it stands, VirtualBox defaults the machine networking mode to NAT. This isn't going to work for our purposes because while a NAT connected guest will be able to access the internet, it will not be accessible by our host operating system.
We're going to want to change from NAT to a method that allows us to talk to the VM. Depending on what we want to do, our options are host-only or bridged. Bridged would expose our vulnerable machine to our internal network. This can be a bad thing, so I selected host-only. In VirtualBox, with the machine selected, select "Settings," then select "Network" and change from "NAT" to "Host-only Adapter."
This is a safe option for a vulnerable machine. Lastly, we need to find the machine on the network. Usually, you would just log in and check the address, but since this is a boot-to-root, we need to figure out where it is. To do so, we will execute the following command.
sudo ifconfig
If you have an issue with ifconfig, you can run apt-get install net-tools.
Ifconfig gives us the status of our vboxnet0 adapter, and tells us where to look for our vulnerable machine, in this case the 172.28.128.0/24 address space. Next, let's execute the following command.
nmap 172.28.128.0/24 -sn
Nmap should return two results, your host machine, and your guest machine. From here, you should be able to launch your attack on the machine.
Digging a Little Deeper
If you find yourself stuck on a machine, you can have a look at the scenario that was generated for the machine. From within the SecGen repository folder, issue the following command.
cd projects
This directory contains previously generated machines. I only have one machine, so I change directories into that machines directory. Within that directory, there is a scenario.XML file. You can view it with the following command.
cat scenario.xml | less
Or, you can alternatively with your favorite text editor, like Vim, by typing the following.
vim scenario.xml
I prefer Vim because it offers syntax highlighting.
If you're looking for hints, you can also type the following into terminal.
cat marker.xml | less
This will give you hints to help you figure out your randomly generated machine.
Step 3Generating Other Scenarios
Writing your own scenarios is out of the scope of this article, but is well-documented at the SecGen GitHub page. Beyond just generating a random VM with the default scenario, some other scenarios can be passed. An example is below.
ruby secgen.rb --scenario scenarios/examples/remotely_exploitable_user_vulnerability.xml run
This will create a VM that has a random remotely exploitable vulnerability. which results in a low privilege compromise.
ruby secgen.rb --scenario scenarios/security_audit/team_project_scenario.xml run
This creates a vulnerable set of machines, simulating a mini enterprise structure. SecGen creates an intranet server, a desktop machine, and a web server. These systems can then be configured in such a way as to simulate a breach into an internal network. This is excellent for practicing network pivots.
You can find more examples in your ./SecGen/scenarios/examples directory.
Stick Around for More on Vulnerable VMs
SecGen is an excellent tool to generate vulnerable VMs. The speed and variety make it perfect for students. I'm hoping that as the tool matures, a community will grow around creating scenarios and distributing them. The educational value is definitely there, and my hope is that the project continues on strong!
Stay tuned for my following article, in which I will attack my newly generated random VM


0 comments:
Post a Comment